Showing posts with label paleo. Show all posts

Monday, August 28, 2023

Catching up on Princess Cakes - Happy Birthday Daddy!

 It's that time of year again... 

And now it's a tradition. 

I've been a bit remiss the last couple of years in updating you about Daddy's Princess Cakes.

I'll remedy that now.

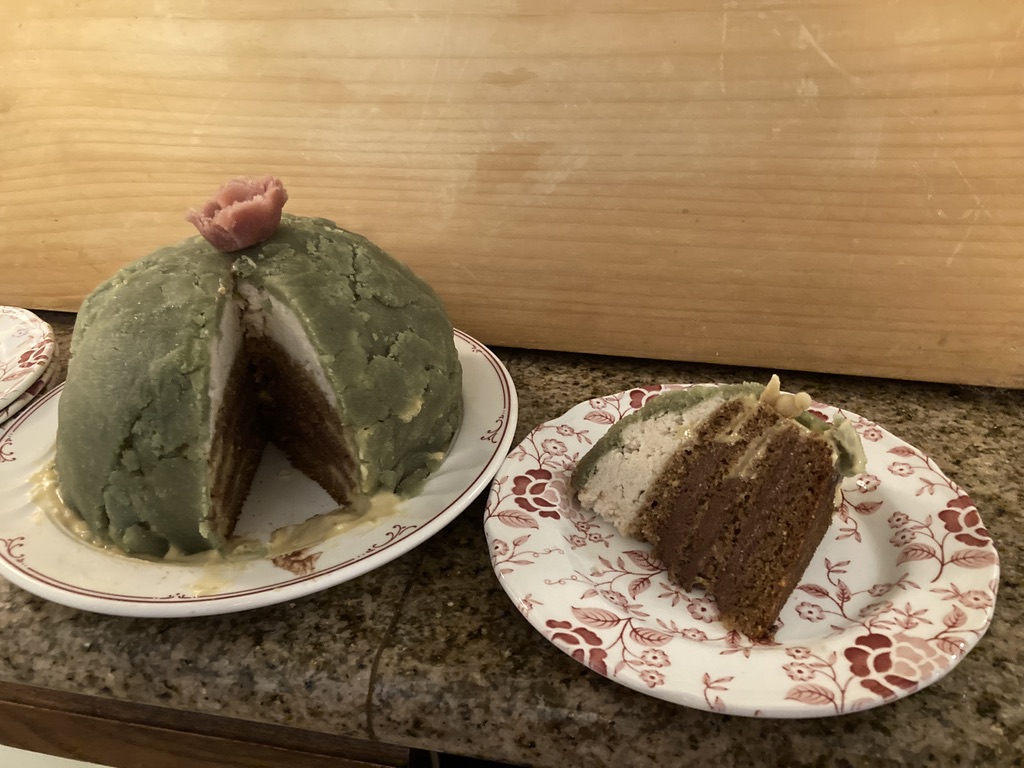
In 2021, I did the Boston Cream Pie theme again. "Plant-based" food coloring lent a subtle coloring to boughten marzipan. Again the high-octane white sugar of the marzipan clashed a little with the natural sweeteners of everything else. 

The creme pat soaked into the cake making it moist and delicious. 


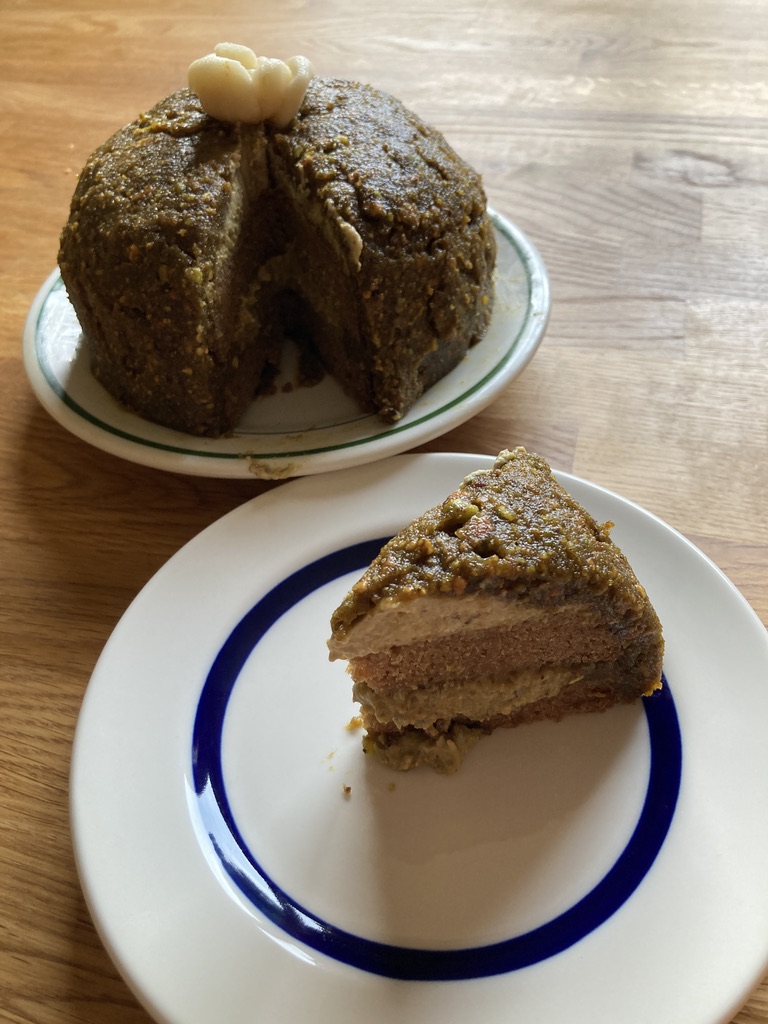
In 2022 I decided to try another of Daddy's favorite cake flavors growing up and made a pistachio and honey marzipan:


In spite of loving pistachio pastries, I felt that the honey and pistachio of the marzipan didn't quite work out. Perhaps I wasn't even using the right type of pistachio! 

and finally...

2023 (Happy birthday love!)

I made date-sweetened almond marzipan and added a little plant-based red food coloring to some for the flower. I liked the simplicity of the date/almond/water marzipan but I think I'll try a honey/almond one next time. The date was sticky and hard to work with and I felt like it was a competing rather than complimentary flavor to everything else going on.


This was the most successful cream dome I've done yet! 

I did kind of wing the cream dome and the creme pat but somehow I managed to pull it together and no one had trouble eating it. 

In spite of my own criticism, my love keeps asking for Princessa Torta for his birthday treat! 

Have you made anything that's healthy AND delicious lately?

Comment below! 


Monday, February 8, 2021

Healthy Flourless Chocolate Cake - Naturally Sweetened

 We now interrupt your previously scheduled programming for breaking news from the kitchen! 


Naturally Sweetened Flourless Chocolate Cake 
(Paleo and with dairy-free option) 

Tuesday, January 5, 2021

From XL to XS - I broke up with eating things that aren't good for me.


I have a secret to share with you all. I didn’t mean it to be a secret, but when you don’t actually see anybody in your life for nine months, sometimes things just don’t get out. 


First I have a little story to tell...

Wednesday, November 25, 2020

Make Ahead Cranberry-Orange Relish and Maple Walnut Pie

 -


Tomorrow is Thanksgiving here in the US. Many of us will be spending Thanksgiving away from our loved ones. My wish is that each of us is still able to spend time focusing on how much we can be grateful for - we are all surrounded by reasons to be thankful, to hold on to hope, and to know that life has many joys in store. 

Wednesday, September 13, 2017

Peaches! WIP Wednesday, September 13th, 2017

-


Creating is my passion, my sanity, my sense of being "up to something", my way of contributing a little bit. I always have a few projects going, many left to the side for months or even years before I pick up the best and carry on. Here's some of what I'm working on this week:


Monday, August 28, 2017

If Daddy wants a Princess Cake, Daddy can have a Princess Cake.

-

Every so often, after we put the girls to bed, HandsomeJoe and I watch an episode or two of something cheerful. We slowly made our way through The Great British Baking Show. When we got to the episode with the Sweedish Princessa Torte, HandsomeJoe proclaimed "I want a Princessatorte for my birthday!" 

If Daddy wants a Princess Cake, Daddy can have a Princess Cake.

He may originally have been kidding.

For his birthday, we made him one.

Saturday, January 14, 2017

Two Ingredient Banana Coconut Cookies - SaturDIY, January 14th, 2017

-

Two Ingredient Banana Coconut Cookies.

You guessed it! They have banana and coconut in them.

I've seen a lot of "two ingredient" recipes (or three or whatever) that include "box of cake mix" or "can of soup" as one of the ingredients. Nope, not these. They have two real foods - Bananas and Coconut. That's it. 

Turns out they make a lovely cookie. 


Gluten-free, grain-free, egg-free, nut-free, soy-free, vegan, "paleo," and more. Unless you're avoiding coconut or bananas, you can eat these!

Saturday, February 13, 2016

Valentines Satur-DIY - healthy peanut butter cups

-

A new series I'll be doing periodically here at Myrrhmade is going to be Satur-DIY posts - occasional tutorials, recipes, and how-to posts. 

This week we have Valentine's Day on our mind. While we stay away from store-bought and glitter-infested, we have been known to make our own chocolate treats.

These are one of the many cases where homemade is not only easy, but they leave out all the corn-syrup, artificial anything, and taste better than their mass-produced counterparts. I may have been told that the commercial versions have been ruined by the marvelousness of these homemade delights.

Here's how we make peanut butter cups:

Monday, March 25, 2013

Paleo Popovers (grain free) - part 2 - individual popovers

-

As promised, I decided to try my popover recipe using muffin tins (instead of a baking pan) and it turned out even easier than I'd expected.

I used the same amounts of all ingredients and split them up into the twelve muffin compartments. If you're using butter it's quite easy to cut each tablespoon of butter into quarters which equals 3/4 teaspoon (three tablespoons divided twelve ways) per popover.


Plus it looks cool. 

The butter melts much quicker so pay close attention. Notice the brown flecks in the photo below as they came out of the oven.


In our oven at 400f these took about 25 minutes. 


After cooling they get a little shorter.

Advantages of individual popovers: Using a dozen eggs means that each popover is one egg and that nifty well in the center is perfect for jam!

Disadvantages: it takes a bit longer prep time, you have to pay closer attention and I find muffin tins take longer to clean than a baking pan.

Overall they are delicious whichever way they are cooked.
-


Tuesday, March 5, 2013

Paleo Popovers (grain free)

-

Our chickens have started laying again, which means we have an abundant supply of eggs. Several of our customers went on vacation and at one point we had more than eight dozen and hadn't yet collected that day!

While I've previously made egg-based almond flour cakes that use at least a handful of eggs, I wanted to make something that would be less of a dessert while still being a treat. My thoughts turned to popovers and I came up with the following:

Paleo Popovers!

Ingredients:

1 dozen eggs
1/4 cup coconut flour
1/4 cup maple syrup (or honey)
3 Tablespoons butter or coconut oil
1 teaspoon vanilla extract (optional)


Directions:

Preheat oven to 400f 

Melt butter in an 8" square baking pan in the oven 
while the oven comes up to temperature.

Mix eggs, coconut flour, and maple or honey.

Pour mixture into melted butter in the preheated pan.


Bake for 35 to 40 minutes or until a toothpick inserted in the center comes out clean.

Full height after 20 minutes.


While it will reach an impressive height about half way through the baking process, it will continue to brown and then collapse a bit as it cools. 

Perhaps someday I'll try this recipe in muffin tins. Until then I doubt we will have a hard time eating it like this. I've now made this recipe more than once and each batch doesn't seem to last even two full days at our house! It's a great protein-rich snack that feels like a dessert. 

-


Sunday, April 15, 2012

Lemon Drop Chia Pudding

-

I've been experimenting  with different types of chia puddings for a bit and this was too delicious not to share. Another plus is that just about everyone I know could it eat! It's vegan, dairy-free, gluten-free, grain-free, chocolate-free, has no refined sugars, and is nutrient dense to boot! Perhaps I'll try a grapefruit flavor next and see how it does.

Lemon Drop Chia Pudding 


Mix together:

  • 1 can of coconut milk (I used full fat)
  • Juice and zest of 1 organic lemon (if you're using the peel it's best to get organic)
  • 1/3c chia seeds 
  • Sweeten to taste (I used about 1/4 cup of maple syrup)
  • 1t Vanilla extract. 

It'll take about an hour to fully soak up the liquid and won't solidify until it's been chilled for a bit longer. It's delicious for days - although I can't honestly attest to longer than a couple as it's never lasted longer in our house.

-

Saturday, September 10, 2011

Modern Foraging and Sumac Lemonade

-
One of the many things I love about having access to wild land is the ability to forage.  

On a walk the other day, I came home with blackberries, a few raspberries (the last of the season), wild grapes, and a big pile of staghorn sumac drupes 
(not to be confused with poison sumac).


I passed by apples, plums, and crab-apples still thriving from when there used to be houses in what is now flood land. The berries I ate immediately after snapping a quick photo. The sumac and the grapes have been turned into other deliciousnesses.

Sumac Lemonade:

I grew up knowing the staghorn sumac (Rhus typhina) as a wild shrub and only knew of using the drupes as perfect material for smoking bees when opening a hive. Recently I came across a brief reference to Sumac Lemonade and had to know more! 

Turns out I had been living near a delicious treasure all these years!


Instructions:

Collect 15 to 20 clean staghorn sumac drupes. 

 Spread them out and remove any critters.


Soak in water for 24 hours. 

Strain, sweeten to taste, and enjoy!


The final sumac juice is very tart like lemon juice and has a wonderful complex flavor that almost reminds me of a rooibos (red tea) lemonade. A concentrate of the sumac juice freezes well for longer enjoyment.

Stay tuned for wild grapes!

-

Monday, July 25, 2011

Quick Cucumber Salad - CSA Veggie Challenge

-

Between our veggie CSA and our own garden we have lots of cucumbers! We've been enjoying blueberry cucumber smoothies, cucumber and dip, and of course, cucumber salad! 


Basic recipe:

Cucumbers!
2T to 4TVinegar - I find cider or rice works best
1/4t to 1/2t (or less!) Sweetener - I like maple best
pinch of salt
fresh ground black pepper (optional)

Directions:

Slice the cucumbers - the thinner the slices the tastier the salad! 

In the past I've used a vegetable peeler, the slicer side of our grater, or in a pinch, just a knife. If you're in the market for mandoline slicer but don't want to pay those kind of prices, I highly recomment Feemster's Famous Vegetable Slicer. I've had mine for a couple of years use it almost daily during the height of veggie season.

Mix all ingredients together. For best results, refrigerate for ten to fifteen minutes before serving.


-

Thursday, July 14, 2011

Homemade Hard Cider - made with wild yeast

-

Hard cider is not only delicious and easy to make, it is a traditional and historic New England beverage. While I only find some of the commercial ciders worth drinking, they hardly compare to the crisp, slightly sweet and bubbly beverage one can make for oneself. 


My first experience with homemade cider several years ago was definitely an inspiration. While doing a min-internship at Wood's Cider Mill (of The Cider House Rules fame) in Vermont, Willis, a dear family friend, brought out some of his own. Since then I've compared every hard cider to his. This Autumn, we plan on bringing several glass carboys up to test our hand at hard cider made from the very best fresh cider. In the mean time, we'll continue with the delicious alternative described with directions below.


To make hard cider, you first need to make a yeast starter.
To do this you'll need apple juice or sweet cider (with NO preservatives in it. Citric acid is ok, but nothing else!) some empty plastic bottles and a few organic apples. It's important that they be organic otherwise they won't have the yeast still on their skins. Choose one each of a few different kinds of apples. Each will have a different yeast on its skin and you want a few choices as invariably at least one will fail or not be as pleasant.

I am pretty hardcore against plastic, but in this case the plastic bottles really do make a difference. It's pretty difficult to squeeze glass bottles to check for pressure and I didn't want to wait until I could go out and buy a fermentation airlock or have one shipped. Instead I use a simplified version made with supplies I already have in the house - see below.

To collect the yeast:
Do NOT wash the apples. Peel the apples and put the peels from each apple into it's own bottle. Add a good amount of apple juice and seal tightly. Leave in a dark, room temperature space such as a cupboard.


Check your mixtures daily and in about a week, you will have your starter! 

Things to check for: 

1.) Pressure on the bottle - within about two days, if the yeast is active, the bottle will start to become firm. Release the pressure daily allowing the yeast to work on the sugars in the juice.

2.) A pleasant smell. Your nose knows! If, at any point, the gas released from the bottle smells rotten or "off", it IS. Discard this bottle's contents. It should smell slightly sweet, a little yeasty, and pleasant.

If, after the week, you have more than one bubbly, pressured, sweet smelling starter than congratulations! You can either pick a favorite, keep a backup, or contrast and compare!

3.) Mold. If there is mold, regardless of how it smells (but it will probably smell bad) discard this bottle's contents.


Now you have your yeast starter mix. At this point you can remove the peels as they've done their job.

Next, mix 1/2c or so of this mix with apple juice (without preservatives!) in a fresh bottle. Leave an inch or so of headspace.

Cover the opening of the bottle with plastic wrap and secure with a rubber band. To make a homemade airlock, puncture the taught plastic wrap with a toothpick making a single small hole.


Place bottles back into the dark room temperature spot. If you are keeping any of your starter, make sure to feed it with some new apple juice and keep it in the fridge. If you use all of your starter, or don't want to keep it, you can always use the last bit of your cider from the bottom of the hard cider bottle.

At a normal room temperature, leave the bottle for 5 days for slightly sweet hard cider and 7 days for a sharper cider. When it's fermented to your taste remove the plastic wrap and seal tightly with a cap. Leave for one more day at room temperature to recharge and then refrigerate! In the refrigerator this capped cider should last anywhere up to several months. Both the pressure and the cold stop the yeast and preserve this delightful concoction at approx 2% alcohol.

When you're ready to drink it, open carefully and enjoy! 

The final inch or so of liquid (and any sediment) at the bottom of the bottle can be used to make another batch. This basic recipe also works well with other types of juices. At a recent party I opened a bottle made with orange juice and must say it was spectacular!


At the time I started experimenting with homemade hard cider, the only available organic apples were not even grown on this continent. I look forward to making hard cider with local cider and yeast from local apples. Then we will truly have a local delight!

-

Saturday, January 8, 2011

Meringues - what to do with all those egg whites

-

 So, you've made eggnog or custard or flan or any other of the delicious egg-yolk heavy recipes I'll hopefully get around to posting this sometime this year.


You now have a bunch of egg whites.

Meringues are a simple, easy, and taste like the most-delicious-air-that-just-melts-in-your mouth treat!

The basic recipe is very simple. Beat egg whites with a teeny bit of vanilla, a little (dry) sweetener and an optional tiny bit of cream of tartar which helps the egg white bubbles from dissolving back to liquid.


I used six egg whites,
1/4tsp of vanilla,
4Tbsps of powdered maple sugar and
1/4Tbsp of cream of tartar.

I have a copper round-bottom bowl that is wonderful for beating eggs and cream and as I'd just purged my hand-held electric mixer (I hadn't used it in well over three years and have a stand-mixer) I chose to whisk the whites by hand. It took far less time and effort than I'd imagined and I will, with pleasure, make these by hand in the future.

When peaks form (even if the droop over) in the egg whites, spoon them in generous amounts onto a parchment paper lined cookie sheet. Bake at a low temperature (I set our oven to 200, although I know it's not accurate) until the outside of the meringues are golden and hard. Try tapping on them with a knuckle and if they give they're not ready. I baked mine for about an hour and a half.

When firm, turn the oven off and leave them in there with the door shut for another hour (or two).

My grandmother used to make a similar meringue cookie that she called "Nighty-nights" where you bake them, turn the oven off and go to bed. In the morning you pull out perfectly crisp and airily delicious meringue cookies.

A NOTE about fresh eggs: Egg shells are porous and moisture naturally evaporates over time. Store-bought eggs are normally, at the very least,  a couple of weeks old. Fresh eggs whites still have too much moisture to properly stiffen. You can experiment with the age of the eggs but I would recommend waiting at least a few weeks from the chicken to meringues.

-

Saturday, December 11, 2010

Seasonal Treats - (non-dairy) Eggnog

-

I do love me some 'nog. Even better when I can still breathe after.

After a slightly less amazing test batch last week, I triumphed last night:

Non-dairy Eggnog
1can coconut milk
4 raw egg yolks (we get our eggs from a local farm)
2 whole raw eggs
2Tbsp maple syrup

blend or mix ingredients thoroughly - make sure to pierce yolks otherwise they may happily shake around but not incorporate themselves into the mix.

Add ground nutmeg to taste and enjoy!

-

Thursday, December 9, 2010

Happy Bunny Home Theater - Peanut Butter Cups

-


For the second edition of Happy Bunny Home Theater we have peanut butter cups!

While there used to be many more of them, we may or may not have eaten all of them.


 To make your own you will need:
Peanut Butter
Blanched Almond Flour (or crumbled graham cracker)
Powdered Maple Sugar (or any granular sugar really)
Chocolate

Optional: mini baking paper cups and mini muffin tin

 Directions: Start chocolate melting in a double boiler or heat-safe glass jar in a shallow pan of water. Make sure to keep the heat pretty low to keep the chocolate from seizing.

Mix peanut butter filling: add a small amount of sugar and crumbly stuff to the peanut butter until the filling is stiffer and sweetened to your taste.

Roll peanut butter mix into teaspoon size balls. Place them on a plate and flatten slightly. Put the peanut filling nuggets into the fridge to stiffen.

If using paper cups spoon a small layer of chocolate into the bottom of each of the paper cups and put in freezer to set. Once the cups each have a disk of hardened chocolate in the base put a peanut butter nugget into each cup and spoon melted chocolate to cover.

If you're not using papers, you can simply dip each cooled peanut butter nugget into the melted chocolate. A good method for this is to lay the nugget on a fork and submerge it in the chocolate. Place the peanut butter cup on parchment paper and carefully slide the fork out from underneath.

-

Sunday, October 17, 2010

Happy Bunny Home Theater - Peppermint Patties

 -

Popcorn with all kinds of fixings is one of our favorite treats. About once a week we put in a movie, make a big bowl of popcorn and snuggle 'til it's all done and gone.

We also have a standing tradition of date-nights, and to make this past Friday evening special, we had the first edition of the Happy Bunny Home Theater.

Our living room is complete with two wired-in wall lights to which I added red paper complete with bunny-shaped cutouts.

I pulled out the couch and rounded up all the pillows in the house for a family-style lounge home theater experience.

To recreate the movie theater consumables, I made peppermint patties to go with our popcorn, lamb-kielbasa, spiced pecans and punch.


I mixed creamed honey with coconut oil and added peppermint oil. Once the mix had cooled I spooned it into little portions.


When the portions have solidified even more (I put them in the fridge to speed the process) they can be formed into patty shapes.

Using a fork I carefully dipped them in melted chocolate (mix of bittersweet and unsweetened to balance the honey) and slipped them onto parchment.

Not a single one survived the evening.

-

Saturday, September 11, 2010

Spanish Cauliflower "Rice"

-

On my list of things to try has been cauliflower "rice." It's been on my list for a while. I do like cooked cauliflower, and rarely ate rice when I did eat rice.

I have made an amazing discovery: cauliflower "rice" is more amazing than rice rice.

I kid you not.


Spanish Cauliflower "Rice" is incredible!

In the words of my husband, "I like it even better than real rice." It's more flavorful, more betterer for you, and easy! Instead of cooking rice at the beginning (or happening to have leftover rice) you merely grate up a head of cauliflower.

For this recipe, I chopped up farmer's market onion and garlic and sauteed them. I used clarified bacon grease although any frying oil would work.

Once the onions started to clear I added approximately two large tomatoes worth of chopped tomato left from the bruisers of our tomato sauce project (a post on that once I get good pictures) and left them to simmahdown.

I then grated the cauliflower and chopped up a farmers market green/red bell pepper.

To the pan I added cumin, coriander, basil, oregano, cayenne, and a teeny bit of turmeric.

As cauliflower does not absorb as much liquid as rice, I waited for the tomato to cook mostly to a sauce before adding in the grated cauliflower. I'm not much of one for mushy peppers so I added the chopped peppers near the end.

This is sure to return soon to our dinner rotation and I can't wait to try asian-inspired fried cauliflower "rice"!

Sunday, August 29, 2010

Almond Crusted Poached Eggs

-

Let me introduce you to something amazing:

Almond Crusted Poached Eggs.

They are AMAZING.

Especially if you can't just fall back on a piece of toast to catch all the goodness from your poached eggs.

Recipe taken from the Primal Blueprint Cookbook (a fantastic cookbook with nothing in it I can't eat!) and pictured here in the back of the photo.

The basic process: poach an egg, sprinkle one side with an almond flour and herb mix, brush with raw egg and add another layer of almond flour mix.

Flop over onto a well greased pan and cook until crispy and brown.

Turn over onto pan and then do your best to not die from how delicious it is.

(Pictured here in a photo by Joe with yellow zukenoodles and homemade tomato sauce)