Thursday, December 15, 2011

Egg and Rutabaga update

-

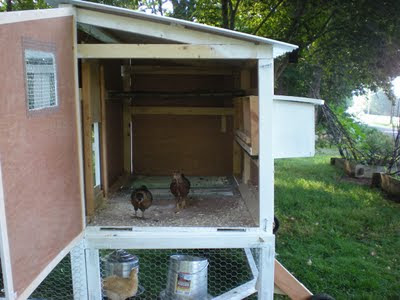
It's been almost three weeks since we found our first egg. It was a few days before we found any more. When we did, we discovered that they had made a nest under the coop in the sheltered part of their yard and had been laying a couple of eggs each day!


Since then we've collected two eggs a day most days and have been enjoying our very own fresh eggs. It took a little convincing to get them to lay in the nesting boxes and not in nests of their own creation, but we're getting the hang of it.

It seems that only the Buff Orpintons are laying. We have two each of four breeds of chickens with four different (possibly five if the Easter Eggers vary) egg colors. Even if any of the other girls showed any interest in the nesting boxes, it is easy to tell whose eggs we find.

It is common for chickens to not lay, or not lay often during the shorter daylight months. It may well be that the other girls will wait until spring to bless us with their eggs. It's doing to be exciting to open up the nesting box to find a clutch of different colored eggs.


Another update: after cutting open the happiest rutabaga, I couldn't help but cut a slice and propped it up on my windowsill. After a couple weeks, he's still smiling! Although he's gained a few wrinkles with his advanced age.


-

Thursday, December 8, 2011

a topper for our tree

-

I love traditions, and I love celebrating. A loved tradition that my husband and I have been able to bring along and make our own is our Christmas Tree. As we continue to purge and downsize our physical belongings and the entourage of stuff we possess, our tradition of a little tree has been able to stay with us. While it was originally a necessity because of the size of our apartment (and budget) it has become a matter of pride. 
 
Our little (rarely over 4ft tall) tree sites on a side table and fills the room with as much delight as a tree twice the size or twice the price.

Collecting ornamental treasures has been a delight of mine since I was very little but never quite had the "what to put on top" question quite worked out. Growing up we often put humorous or something that happened to be at hand - such as a hedgehog dog chew toy, or a duck puppet - but I wanted something that could be illuminated and celebrate the lighting of the darkness, just as the tree itself. 

I made a simple paper star and could not be more thrilled with the results! I can't find the tutorial I used but it's the same as this one

-

Sunday, December 4, 2011

Happiest Rutabaga

-

Since the end of our farmshare we have been gathering vegetables from farmer's markets, my step-father, and our own stores and gardens.

From the Coventry winter Farmer's Market we got some rutabagas a couple of weeks ago as I'd wanted to make a better Upper Peninsula (of Michigan) pasty.  I made some improved ones a few weeks ago and while they were fantastically delicious, I knew I could do better. 

I cut into one of the rutabagas and found this:


The happiest rutabaga!

Happy rutabagas are tasty rutabagas.
-

Sunday, November 27, 2011

We got an egg!

-

We moved the chicken coop to their winter spot. There's not enough left growing on the ground to be able to leave them in one place for more than a day or so. We've moved their pen to a spot in our back yard where it will stay until spring. We will spread dried leaves and other bedding materials in their yard and they will poop, scratch, and peck it to lovely compost throughout the winter.

As Joe went to move the coop he found an egg! Our very first pullet egg!


A pullet is a chicken that is less than a year old. The first eggs laid by a chicken are smaller than regular eggs.  After a bit they get the hang of it but as someone who appreciates lots of little things, I've always loved the little eggs!


Here's our egg on the left with a store-bought egg on the right. Hooray for our chickens!

-

Tuesday, November 22, 2011

Our House in the Storm

-
I've just about gotten everything ready for our mini-Thanksgiving break and so have time to come up for air and make a post. 

Just about three weeks ago our area of the country was hit by an extra early snow storm - before leaves were even off the trees which caused a fair amount of trees to break and caused quite the rukus. Our street was out of power for a full week with our house just a little bit longer. 

Both my husband and I were out of town (in different directions) for the storm itself but our dearest cousin Ben was able to snap the following picture:


Joe arrived home the following afternoon to no power and a clear front door, 
thanks to the marvelous Ben! 

The night after that I arrived home with some supplies from where I had been ( where they still mostly had power). I started up the charcoal grill and stewed and steamed us up a warm supper. Thank goodness for cast iron pans! 

As I cooked Ben once again came to our rescue and connected the chimney pieces I'd brought home for the woodstove we'd bought and brought home a week or so before the storm. (How is that for providence!) 

With the woodstove and a small generator my mum found for us mid-week we made it through the full week without electricity with very little loss or even hardship. I am so thankful for the preparation we did for the hurricane (that we didn't end up needing then) and for the extra measures preparedness measures we now have. 

Living without electricity for a week definitely simplified life and allowed us to really spend time together. Our routines and life during that week evoked daydreams of frontier living and lent a satisfaction, sense of accomplishment, and hardiness we both crave in our normally-electric lives. While we were relieved when we finally had power again, there was a bit of sadness at the return to the hectic higher-speed life of modern conveniences.

I hope you all made it through the storm even half as well as we did!

-

Monday, November 14, 2011

Garden Bed Cleanup and Planting Garlic

-
Due to a week without power (almost two without internet) following a freak pre-haloween snowstorm I'm a bit behind on posting. I've had a couple saved up and here we go!

The week before the storm I finally got around to cleaning up the garden beds - with a little help from the girls!


They take bathing and cleanup rather seriously. I also got a chance to use the new dibble I bought at the Garlic Festival from good friends Hope and Hugh Davis of The Farmstead. Jake chewed my old one and they're so helpful I'm happy to have another.


I'm so excited to try two new varieties of garlic this year (also purchased at the Garlic Festival), Bavarian Purple and Russian Giant as well as planting about a third of our harvested garlic from last year.

We did have a couple little incidents. I called home from school just after class and Joe asked me if I was interested in garlic chicken. One of our buffys (the blond chickens are buff orpingtons) had escaped the pen and had found her way to the as yet un-mulched garlic beds. We'll find out how much she managed to find before she was stopped but Joe said she pretty well reeked of garlic. The following day Jaker got into the bed and had a bit of a snack on the manure I'd worked into the soil but left a shiny clove of garlic.

Now the beds are mulched and even weighted with sticks to prevent any more snacking and we're looking forward to more garlic and scapes next year!

-

Monday, October 17, 2011

New Windows!

-
 
Work trips, being sick, school deadlines, our newest addition to the team, as well as the work that goes with the change of seasons would be enough but on top of that we got all of our windows replaced! 
 

The change is definitely noticeable. Our little snug house just got much more snug! We will also feel the benefit in warmer seasons when we will have the option of opening each and every window! Not only will we be able to get the darned things open, they all now have screens! We knew it would make a difference and that we would love it, we just didn't know how much!


Friday, September 30, 2011

New Addition to our Homestead

-
With a house that is more than 75 years old, there are lots of places where the darned varmints can easily come in to escape the cold. In a place like this mouse-catching is a very valuable skill. While we've caught a few with traditional traps and even found one of the less-than-intelligent ones in a water jug one morning, it was time to bring in an expert.


Meet Thelma our new "barn" cat. 

When she's accustomed to our rhythm and a little older, she'll spend her days outdoors and her nights in our walk-in basement encouraging the tiny critters to find another residence.

She loves visitors and purrs loudly for a rub and a snuggle. At the ripe old age of four months it's important to spend a lot of time with her and get her accustomed to people and the rules of our home.  Stop by and meet her, we would all love to see you!

Wednesday, September 28, 2011

Three Amazing Years.

-

Last week my husband and I celebrated our 3rd anniversary. Complete with a brand new pantry (for me -below the white beam to the right of the stairs), wild grape jelly (post to follow) and whiskey (for him), brunch at O'Rourke's in Middletown and just a grand day together overall.


Thank you to my dear husband for three amazing years and such a wonderful 
addition to our home! 
-

Tuesday, September 13, 2011

Family Traditions - Franklin County Fair

-

While there were several yearly fairs within an easy driving distance of most my childhood homes, the Franklin County Fair has always been a favorite. While it has its share of carnival rides and games like the rest, my favorite parts of the Franklin County Fair have always been the produce and craft competitions.


As children, my brother and I entered our own creations into the competitions - from creative scarecrows and flowers to baked goods and hand crafts. Over the years I won first prize for my petunias and my muffin mix (with muffins to prove its worthiness!) and was even robbed of first prize for my knitting as the judges didn't think I could have made something that well by myself.


Each year I look forward to seeing everything on display in the round house and the children's building as well as all the different animals. This tradition would not be complete without a piece of fried dough with maple cream from the local booth. I'm happy to steer clear of any booth with large lettering (like the non-local vendors) and am content to reminisce and even drool over the gorgeous array of home-canned foods on display from the competitions.


It's always interesting to watch things change as the years pass. One delightful addition to this year's fair was compost and recycle bins at the trash stations. I am so thankful to live in a place where even mainstream events are becoming aware of the need for efforts just like this.


 Now I shall look forward to my other favorite fair each year, the North Quabbin Garlic and Arts Festival in October. Especially as we look toward expanding our family, I am so thankful to have these traditions to mark the yearly rhythm of our life.

-

Saturday, September 10, 2011

Modern Foraging and Sumac Lemonade

-
One of the many things I love about having access to wild land is the ability to forage.  

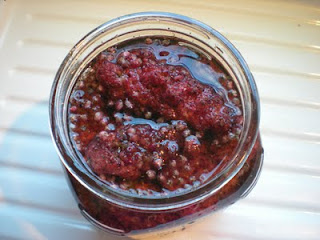
On a walk the other day, I came home with blackberries, a few raspberries (the last of the season), wild grapes, and a big pile of staghorn sumac drupes 
(not to be confused with poison sumac).


I passed by apples, plums, and crab-apples still thriving from when there used to be houses in what is now flood land. The berries I ate immediately after snapping a quick photo. The sumac and the grapes have been turned into other deliciousnesses.

Sumac Lemonade:

I grew up knowing the staghorn sumac (Rhus typhina) as a wild shrub and only knew of using the drupes as perfect material for smoking bees when opening a hive. Recently I came across a brief reference to Sumac Lemonade and had to know more! 

Turns out I had been living near a delicious treasure all these years!


Instructions:

Collect 15 to 20 clean staghorn sumac drupes

 Spread them out and remove any critters.


Soak in water for 24 hours. 

Strain, sweeten to taste, and enjoy!


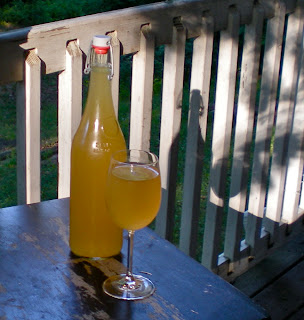
The final sumac juice is very tart like lemon juice and has a wonderful complex flavor that almost reminds me of a rooibos (red tea) lemonade. A concentrate of the sumac juice freezes well for longer enjoyment.

Stay tuned for wild grapes!

-

Tuesday, September 6, 2011

Where I've been these last few weeks:

-

In the kitchen!

Between the beginning of fall harvest and the abundance of our farm-share, we have been keeping busy putting food by.


We've frozen: collards, kale, italian flat beans, green beans, peach slices, apple slices, raspberries, zucchini and summer squash slices, grated zucchini, loose-frozen thick grated summer squash, carrot tops, lime basil leaves, cilantro chutney and so much more! 


We've canned salsa verde, peach salsa, tomato sauce, sliced peaches and apple butter. And boy! we're not done yet!


We also have seven jars of pickles fermenting and no end of our cucumber bounty in sight!

When there isn't anything left to pick outside we'll have plenty inside for the pickin's. We're still hoping to make apple chutney, at least three times more jars of tomatoes, green tomato relish, and possibly try our hand at fermented ketchup. And that's even before winter squashes ripen. 

We have our first fledgling efforts at root-cellaring with beets packed in sawdust and hope to get carrots, parsnips, turnips/rutabagas and more.

When canning, I'm always thankful when the amounts don't quite match up to the jars and there's a bit that just HAS to be eaten right away.

-

Thursday, August 18, 2011

Homemade Laundry Detergent

-

I've come across many recipes for homemade laundry detergent and have always kept them in the back of my mind to try. I even got all the ingredients and had them around for months. Finally our detergent ran out. We went to the store to get more and managed to walk out with everything we needed but not the detergent.


I took this as a sign to actually get around to making my own. There are many recipes online and the majority seem to follow the same basic recipe. So I gave it a try and I LOVE it! Our clothes are clean and fresh with no residue. It's so easy and so simple! I've now made three batches to fill our container and it should last us at least six months.

Ingredients:

1c Borax
1c Wash Soda
1 Bar of soap

Both borax and wash soda can be found with the laundry detergents at grocery stores etc.


Grate the soap and pulse in a blender or food processor until powdered.


Mix with borax and wash soda.

Use.


Use 1 to 3 tablespoons  per load depending on size of load and how dirty it is. Works with high efficiency machines.


-

Sunday, August 14, 2011

Good Fences Make Good Neighbors

-


"Before I built a wall I'd ask to know
What I was walling in or walling out" 
-From Mending Wall by Robert Frost


We are happily back home with our dog and our girls. I'm getting excited about putting up the  harvest and looking forward to trying out some new recipes. I start school again in a couple of weeks and am interested to see how that fits in with our other adventures this fall!

-

Monday, July 25, 2011

Quick Cucumber Salad - CSA Veggie Challenge

-

Between our veggie CSA and our own garden we have lots of cucumbers! We've been enjoying blueberry cucumber smoothies, cucumber and dip, and of course, cucumber salad! 


Basic recipe:

Cucumbers!
2T to 4TVinegar - I find cider or rice works best
1/4t to 1/2t (or less!) Sweetener - I like maple best
pinch of salt
fresh ground black pepper (optional)

Directions:

Slice the cucumbers - the thinner the slices the tastier the salad! 

In the past I've used a vegetable peeler, the slicer side of our grater, or in a pinch, just a knife. If you're in the market for mandoline slicer but don't want to pay those kind of prices, I highly recomment Feemster's Famous Vegetable Slicer. I've had mine for a couple of years use it almost daily during the height of veggie season.

Mix all ingredients together. For best results, refrigerate for ten to fifteen minutes before serving.


-

Wednesday, July 20, 2011

Kitchen Blackboard

-

It's been quite a while since I discovered the existence of blackboard paint  - paint that creates a blackboard surface. While I enjoy the idea of a blackboard wall (how I originally saw the paint used), our kitchen has no feasible walls for this purpose. After one of the last kitchen-reorganizations we ended up with a big empty space on one wall.

(taken at night) 


I had thought we would put up a piece of art and set about the 
patient task of waiting to find the right piece. 

I then saw Edgefield Farm's farmer's market signs and I knew I'd found our answer. Now I just needed a frame to make it look nice. As I wanted a rounded frame, and not just a standard square, I knew my best bet would be to find one used. While doing some errands in Brattleboro, VT, we popped in to the local hospice thrift store and right there on the first table was an oval mirror with a beautiful frame!

It definitely needed some love so I removed the mirror and spent a bit of time gluing, sanding, and treating the wood frame. I added a notched wood bar across the back and voila!


I am so delighted to have such a beautiful addition to our kitchen 
and look forward to having yet another simple creative outlet.

-

Thursday, July 14, 2011

Homemade Hard Cider - made with wild yeast

-

Hard cider is not only delicious and easy to make, it is a traditional and historic New England beverage. While I only find some of the commercial ciders worth drinking, they hardly compare to the crisp, slightly sweet and bubbly beverage one can make for oneself. 


My first experience with homemade cider several years ago was definitely an inspiration. While doing a min-internship at Wood's Cider Mill (of The Cider House Rules fame) in Vermont, Willis, a dear family friend, brought out some of his own. Since then I've compared every hard cider to his. This Autumn, we plan on bringing several glass carboys up to test our hand at hard cider made from the very best fresh cider. In the mean time, we'll continue with the delicious alternative described with directions below.


To make hard cider, you first need to make a yeast starter.
To do this you'll need apple juice or sweet cider (with NO preservatives in it. Citric acid is ok, but nothing else!) some empty plastic bottles and a few organic apples. It's important that they be organic otherwise they won't have the yeast still on their skins. Choose one each of a few different kinds of apples. Each will have a different yeast on its skin and you want a few choices as invariably at least one will fail or not be as pleasant.

I am pretty hardcore against plastic, but in this case the plastic bottles really do make a difference. It's pretty difficult to squeeze glass bottles to check for pressure and I didn't want to wait until I could go out and buy a fermentation airlock or have one shipped. Instead I use a simplified version made with supplies I already have in the house - see below.

To collect the yeast:
Do NOT wash the apples. Peel the apples and put the peels from each apple into it's own bottle. Add a good amount of apple juice and seal tightly. Leave in a dark, room temperature space such as a cupboard.


Check your mixtures daily and in about a week, you will have your starter! 

Things to check for: 

1.) Pressure on the bottle - within about two days, if the yeast is active, the bottle will start to become firm. Release the pressure daily allowing the yeast to work on the sugars in the juice.

2.) A pleasant smell. Your nose knows! If, at any point, the gas released from the bottle smells rotten or "off", it IS. Discard this bottle's contents. It should smell slightly sweet, a little yeasty, and pleasant.

If, after the week, you have more than one bubbly, pressured, sweet smelling starter than congratulations! You can either pick a favorite, keep a backup, or contrast and compare!

3.) Mold. If there is mold, regardless of how it smells (but it will probably smell bad) discard this bottle's contents.


Now you have your yeast starter mix. At this point you can remove the peels as they've done their job.

Next, mix 1/2c or so of this mix with apple juice (without preservatives!) in a fresh bottle. Leave an inch or so of headspace.

Cover the opening of the bottle with plastic wrap and secure with a rubber band. To make a homemade airlock, puncture the taught plastic wrap with a toothpick making a single small hole.


Place bottles back into the dark room temperature spot. If you are keeping any of your starter, make sure to feed it with some new apple juice and keep it in the fridge. If you use all of your starter, or don't want to keep it, you can always use the last bit of your cider from the bottom of the hard cider bottle.

At a normal room temperature, leave the bottle for 5 days for slightly sweet hard cider and 7 days for a sharper cider. When it's fermented to your taste remove the plastic wrap and seal tightly with a cap. Leave for one more day at room temperature to recharge and then refrigerate! In the refrigerator this capped cider should last anywhere up to several months. Both the pressure and the cold stop the yeast and preserve this delightful concoction at approx 2% alcohol.

When you're ready to drink it, open carefully and enjoy! 

The final inch or so of liquid (and any sediment) at the bottom of the bottle can be used to make another batch. This basic recipe also works well with other types of juices. At a recent party I opened a bottle made with orange juice and must say it was spectacular!


At the time I started experimenting with homemade hard cider, the only available organic apples were not even grown on this continent. I look forward to making hard cider with local cider and yeast from local apples. Then we will truly have a local delight!

-

Tuesday, July 12, 2011

Cilantro Chutney - CSA Veggie Challenge

-

If you're one of those people who doesn't like cilantro, I apologize and suggest you skip the rest of this post. 

For the rest of you, read on!


In last week's Veggie CSA share, we got a large bunch of cilantro. What the heck do you do with this much cilantro? Cilantro chutney!

Cilantro chutney is the delicious green sauce often found next to the tamarind sauce at our local Indian restaurants. I knew I liked it but never knew that it was cilantro (with mint) or that it was this easy to make!


 In your blender or food processor, blend/process ingredients until smooth.

Ingredients:
1c fresh cilantro,  packed
1/4c chopped onion*
healthy shake or two of dried red pepper (hot), or similar*
1T fresh mint
small clove garlic*
1/2t lemon juice
1t maple
1/4t salt
3T water
black pepper
1/4t coriander 

*optional - see bottom of post.

Fun fact: cilantro leaves and coriander 
seeds come from the same plant: Coriandrum sativum


We ate about 1/4 of the recipe with some freshly heated naan bread and froze the remaining in an ice cube tray to enjoy at a later date!

This recipe is a conglomeration of a slew of online recipes that used only ingredients I had on hand. Many recipes called for using up to half as much fresh mint as cilantro but I used what I had. I look forward to experimenting with proportions in future batches.

* Items marked with * were only found in some of the recipes I used for inspiration. I happen to like these ingredients and can eat them so I included them.

-

Saturday, July 9, 2011

Painting the Livingroom - Another pre-party project

-

One of my big goals for the summer break from school was to paint my living room.
All the other rooms in the living space of our house have gotten some attention. Our living room however had been sadly neglected, even though it's one of the most used rooms.


Taking inspiration from several memorable rooms my mother has painted over the years as well as the traditional lazure-style painting of my waldorf school classrooms, I decided to experiment. 


I am so thrilled with the result. It is so delightful to be drawn to a room and have one of our main environments be an inspiration rather than merely ignore it mumble about its neglect.

-

Thursday, July 7, 2011

A coop for the girls

-

These last few weeks have been a little crazy. On this past Saturday we had about 30 people over for a graduation/promotion/celebration party for my husband. One of the big projects we wanted to get done before the party was to get the chickens out of the house (more pre-party projects in subsequent posts). As tempted as we were to open the door and toss them out (they were getting kind of loud!), we figured it would be better to give them a house of their own. 


We got the final hardware on and chicken wire stapled up the morning before the party, and out they went! It took a few days of showing them what to do (to use the ramp to get in and out, to use the roosts for sleeping etc) before they really got it on their own. They've never been so happy to be chickens!


Noteworthy items shown above: 
1.) Ventilation: chickens need lots of fresh air but not drafts of cold so we added a window in the door and a mesh area under their roosts which also allows the droppings to fall to the ground. 
2.) Sliding door that opens via rope and pulley accessible from outside the coop. 
3.) Nesting boxes with landing strip across the front. The roof of the boxes lifts up from the exterior for egg collection when the girls mature. 
4.) sheltered area under the coop for food and water. This allows the girls more outdoor space without a larger footprint for the portable coop. Another benefit is that at night, chickens feel more secure when they're a few feet off the ground. 
5.) Safety latches: racoons are pretty clever little buggers and can figure out many types of latches and bolts.
6.) Wheels! While it will be a little cumbersome until we can put some sort of extendable handle bars on, I can move the coop by myself. Which is a necessity for us as I will be the primary chicken-mover. Throughout the growing season they will get moved once or twice a week to a fresh spot on our property.


Here is a shot from their first day in the coop. Because they didn't have a mother to show them the works, the first few nights we lifted them by hand. Now, less than a week later, they each get up there on their own and snuggle in for the night.

-

Wednesday, June 22, 2011

Quirky Lamp - my favorite piece from Ceramics II

-


I finally got around to finishing the wiring on one of my pieces from my ceramics class last semester. Thanks to my mum for the nudge and some of the parts!


The assignment was to combine two wheel thrown pieces into a unified piece. This is one of mine and it turned into my favorite piece of the semester!


This quirky little guy can finally go up to my studio and help me with writing letters. Pixar may have the upper hand on animated lamps with character, but I must say, I'd rather have this guy.

-

Saturday, June 18, 2011

Worms! (or: More fun things you can get in the mail!)

-


We got worms! In the mail! Vermiculture, or worm-farming (for compost or bait) has piqued my interest for some time. We had an electric indoor composter for the first year or so we lived here in our house and slowly killed it as it was not the right composting method for our family. Since learning about worm composting I am excited to be able to harness these blessings for our gardens and plants.


Worm poop, or "castings" are a natural fertilizer that will not burn plants, even when applied directly, unlike most commercial fertilizers. Also, they don't smell! The more I learn, the more I am excited about all the benefits! Plus it's kind of cool to have a big bin of worms. 


-