-
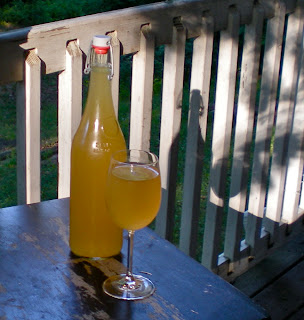
Hard cider is not only delicious and easy to make, it is a traditional and historic New England beverage. While I only find some of the commercial ciders worth drinking, they hardly compare to the crisp, slightly sweet and bubbly beverage one can make for oneself.
My first experience with homemade cider several years ago was definitely an inspiration. While doing a min-internship at Wood's Cider Mill (of The Cider House Rules fame) in Vermont, Willis, a dear family friend, brought out some of his own. Since then I've compared every hard cider to his. This Autumn, we plan on bringing several glass carboys up to test our hand at hard cider made from the very best fresh cider. In the mean time, we'll continue with the delicious alternative described with directions below.
To make hard cider, you first need to make a yeast starter.
To do this you'll need apple juice or sweet cider (with NO preservatives in it. Citric acid is ok, but nothing else!) some empty plastic bottles and a few organic apples. It's important that they be organic otherwise they won't have the yeast still on their skins. Choose one each of a few different kinds of apples. Each will have a different yeast on its skin and you want a few choices as invariably at least one will fail or not be as pleasant.
I am pretty hardcore against plastic, but in this case the plastic bottles really do make a difference. It's pretty difficult to squeeze glass bottles to check for pressure and I didn't want to wait until I could go out and buy a fermentation airlock or have one shipped. Instead I use a simplified version made with supplies I already have in the house - see below.
To collect the yeast:
Do NOT wash the apples. Peel the apples and put the peels from each apple into it's own bottle. Add a good amount of apple juice and seal tightly. Leave in a dark, room temperature space such as a cupboard.
Check your mixtures daily and in about a week, you will have your starter!
Things to check for:
1.) Pressure on the bottle - within about two days, if the yeast is active, the bottle will start to become firm. Release the pressure daily allowing the yeast to work on the sugars in the juice.
2.) A pleasant smell. Your nose knows! If, at any point, the gas released from the bottle smells rotten or "off", it IS. Discard this bottle's contents. It should smell slightly sweet, a little yeasty, and pleasant.
If, after the week, you have more than one bubbly, pressured, sweet smelling starter than congratulations! You can either pick a favorite, keep a backup, or contrast and compare!
3.) Mold. If there is mold, regardless of how it smells (but it will probably smell bad) discard this bottle's contents.
Now you have your yeast starter mix. At this point you can remove the peels as they've done their job.
Next, mix 1/2c or so of this mix with apple juice (without preservatives!) in a fresh bottle. Leave an inch or so of headspace.
Cover the opening of the bottle with plastic wrap and secure with a rubber band. To make a homemade airlock, puncture the taught plastic wrap with a toothpick making a single small hole.
Place bottles back into the dark room temperature spot. If you are keeping any of your starter, make sure to feed it with some new apple juice and keep it in the fridge. If you use all of your starter, or don't want to keep it, you can always use the last bit of your cider from the bottom of the hard cider bottle.
At a normal room temperature, leave the bottle for 5 days for slightly sweet hard cider and 7 days for a sharper cider. When it's fermented to your taste remove the plastic wrap and seal tightly with a cap. Leave for one more day at room temperature to recharge and then refrigerate! In the refrigerator this capped cider should last anywhere up to several months. Both the pressure and the cold stop the yeast and preserve this delightful concoction at approx 2% alcohol.
When you're ready to drink it, open carefully and enjoy!
The final inch or so of liquid (and any sediment) at the bottom of the bottle can be used to make another batch. This basic recipe also works well with other types of juices. At a recent party I opened a bottle made with orange juice and must say it was spectacular!
At the time I started experimenting with homemade hard cider, the only available organic apples were not even grown on this continent. I look forward to making hard cider with local cider and yeast from local apples. Then we will truly have a local delight!
-


Wow, it only takes a week?!
ReplyDeleteYou can grow all sorts of stuff in your cupboard :)
Though, I must say, this isn't nearly as weird as kombucha
Kombucha is definitely a little odd. Not quite as odd however as signs on kombucha that say "babies don't drink" :)
ReplyDeleteWell, babies shouldn't drink. Or drive.
ReplyDeleteWe ordered the apples and are planning to have a hard Cider making party with the family next week.I am bookmarking your blog and will probably be back to ask advice:) Barefoot Mama
ReplyDeleteHow exciting! And welcome! I'm always happy to answer any questions.
ReplyDeleteso what do you use the starter for
ReplyDelete