-
Our littlest dragon recently turned 3. (THREE!!!)
To celebrate we had a small family dragon party.
Having two girls with birthdays near Halloween leads to an easy combination of costume usage.
We ate dragon food.
Dragon Hoodie
Here's how I made dragon hoodies and dragon tails. Also works for dinosaurs. Before Halloween I plan on making fabric wings and maybe knitted dragon leg
warmers.
I read a lot of tutorials about how to make dinosaur and dragon hoodies. Many of them made individual spikes and then attached them. Nope. I made my own simplified version.
Using a premade hoodie and stretchy/knit fabric (jersey, sweatshirt fleece, etc.) measure the length of the hood seam down the center back to the bottom hem. Cut a strip of accent fabric this long and about four inches wide.
Sew the center of the strip lengthwise down the outside of the hood seam and down the back of the hoodie, sewing through the accent fabric and the hoodie.
Fold the fabric over on itself (two layers) with the seam as the fold where it is sewn to the hoodie.
Topstitch a zigzag the whole length of the added strip of fabric, forming the spine spikes.
Trim out the spines along the outside of the stitching. Use pinking shears if you have them.
The trouble with trying to photograph little dragons is that they won't ever stand still.
Dragon tail
Measure the length you want the tail to be - I took a pair of A's pants and did about mid-calf length.
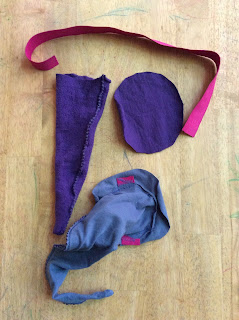
Cut out a triangular piece of the main color and a long skinny triangle of the accent (spines) color. The accent spikes will taper down toward the point of the tail. You can judge the thickness at the base of the tail by holding the top edge of the fabric in a circle with your hands.
If your fabrics have a right side and a wrong side, fold the accent (spines) piece with wrong sides together inside the main color piece with right sides together - the right sides of both pieces will be touching.
Your seam will go through four layers of fabric - the accent piece's two layers will be sandwiched between the layers of the main color piece making one seam. If you look closely at the photo above you can see the accent color peeking out at the top.
Turn right side out and follow the instructions on the hoodie above for sewing and trimming the spikes.
To make the base end of the tail, cut a circle larger than the diameter of the end. Folding a square in quarters you can easily trim the corners into a circle.
Measure your child's waist worth of elastic, over their clothing.
With the tail inside out, pin circle to the end of the tail with the ends of the elastic caught in the seams and the bulk of the elastic inside the inside out tail.
Sew almost all the way around the circle (see blue tail in second photo above) leaving a gap to turn everything right side out.
Turn right side out, stuff, and hand sew the small gap.
Good luck trying to get them to be still enough for a photograph.
We also made firebreathing dragon noses, origami dragons, and colored and assembled articulated chinese dragon puppets (free printable template - submitting email required).
Hooray for dragons!
-


No comments:
Post a Comment